

Here at Rocking Sprocket, we’re a huge fans of space and all things associated with it. Almost every NASA and SpaceX live event is watched happily, and the James Webb Space Telescope (JWST) was no different. We were incredibly excited about it.
On the 25th of December 2021, it was launched into space after 30 years of development. It reached Lagrange Point 2 (L2) on January 24th, nearly a month later. It took a few months to line up and calibrate its mirrors, and on the 12th of July 2022, we got the first bunch of images back from it.
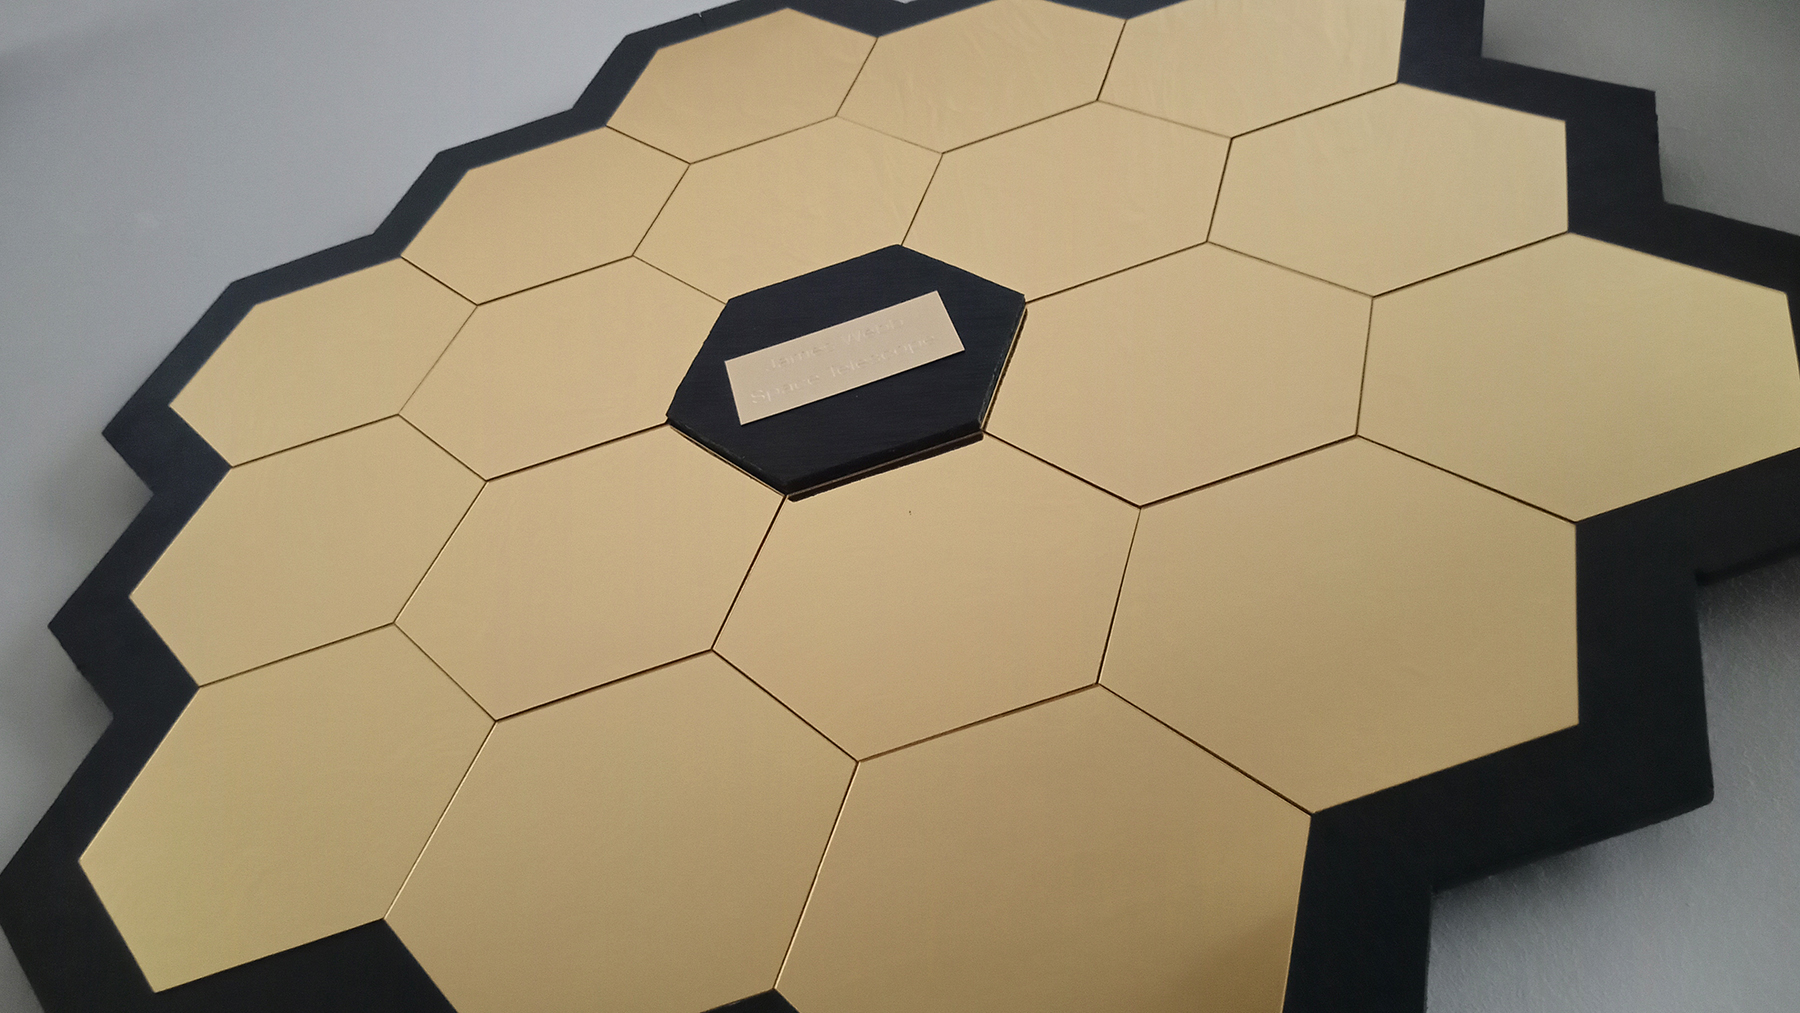
A very noticeable part of the design of JWST is the 18, beryllium, hexagonal mirrors, which are coated in gold. Gold is much better at reflecting light from the infra-red spectrum, which is needed if we are going to attempt to learn about the origin of the universe. JWST was estimated to be operational for only 5 and a half years, but the successful launch has suggested that it will remain useful for 10 years, perhaps even more. Regardless of how long it lasts, we hope it’s going to make some magnificent discoveries.
Our love for this beautifully brilliant machine knew no limits as we realised that we definitely needed something in the house to hark back to it. We loved seeing people in groups we were in making mirrors that resembled JWST, and we essentially rushed to our local hardware store.
We wanted our mirror to be roughly 60cm X 60cm but struggled to find a singular piece of board that was big enough. We settled on two smaller boards with the idea we would join them up with some battens on the back.
For this project we used: Two plywood sheets, timber battens, 18 gold hexagonal mirrors, black paint, and we chose to put a custom brass coloured plaque in the centre; however, that’s optional.
Tools we used are: a jigsaw, a mechanical pencil, various set squares and rulers, sandpaper, wood glue, and a variety of paintbrushes.
We cut out three strips of battening wood, and fastened them to our boards, inevitably fastening the smaller boards together. Our plywood had a slight warp in them, but luckily, fastening our timber battens down, fixed this slightly noticeable error. Once we had our single board, we arranged our mirrors so we could draw an outline around them.
Once we had an outline of where the mirrors would sit, we then measured an inch from where we’d drawn, to make a border that would look like the black outer heat shield. We did this all the way around, marking the shape with a ruler and pencil.
We used a jigsaw to cut out the shape, as we wanted it as neat, and as accurate as we could make it. It didn’t take long to cut out fully, and we decided to make a hexagonal wooden centre piece, and cut it out. Hopefully this would make it easier to line up all of the mirrors later on.
We sanded down the mirror face, to ready it for painting. We then realised that we wouldn’t be able to see the guidelines once the mirror was painted, so we decided to paint our small wooden centre piece first. As soon as it was dry, we glued it down to the middle and started painting the rest of the mirror. We gave both sides two coats of paint.
The next step was one we’d been dreading. We had to stick the mirrors down to the wooden mirror back we’d created. This was a pivotal moment in the build, and we were overly conscious of the fact that once we’d stuck them down, we couldn’t go back. With this in mind, we laid out and examined where we wanted each mirror to go with excruciating detail.
We did eventually stick the hexagonal mirrors down, and we were then able to do the beautifully satisfying job of peeling the plastic covers off of them. Definitely the best bit in my opinion. The final step for us was sticking down the custom engraved plate in the centre, giving the mirror a quick wipe and then we were done!
The mirror looks incredible, and its likeness to its inspiration is uncanny. It took 3-4 days to complete, and we think it was absolutely worth it as we had a lot of fun building it. It is going to be sat on our wall proudly for many, many years to come.
We made a video on this project (below) where you can see us working on it in visual detail. It isn’t a very difficult, or time consuming project, but its one that we’re never going to regret doing.
Please like, and subscribe to our YouTube channel – it helps more than you think.
Happy making!
Rocking Sprocket